Insert Objects
GloboNote allows you to insert objects such as insert image, checkbox, list and attach file to your note.
Insert Image/Photo
There are 2 ways you can insert an image:
- Using the Note's menu
- Using Clipboard data
Below explained in details on how to use.
Using the Note's menu
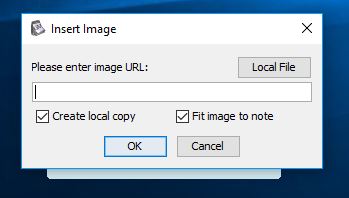
You can insert an image file by right click on the note then go to Insert -> Image. Select the image file you want to insert, it can be a URL or local file.
There is a Create local copy check box in the insert image window. If it was checked, a copy of the image file will be created on GloboNote storage, so even if you move the original image to other location, the image will still be showing on the note.
If Create local copy check box was unchecked, it will just link to the original file.
Using Clipboard data
You can paste image directly to the note from clipboard. For example, you take screenshot using Print Screen key, you can paste the image to the note by pasting it or press "Ctrl + V"
Image Context Menu
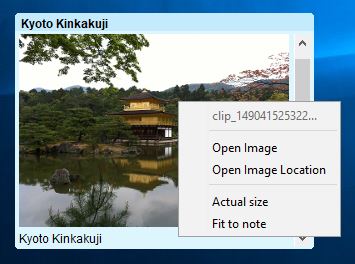
Right click on the image to show context menu
- <Image filename> - Shows you the filename of the image
- Open Image - This will open the image using OS default image viewer
- Open Image Location - This will open a file explorer and navigate to the path where image can be located
- Actual Size - Resize the image to its actual size
- Fit to note - Resize the image to fit the note size
Note: Make sure you don't display too many notes with images. This might eat a lot of resources and make your system slow.
Attach files
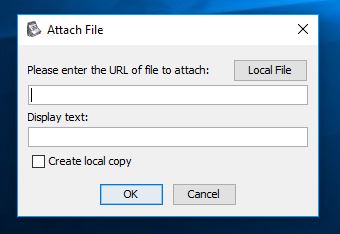
The attach files feature of GloboNote can be access by right clicking the note then go to Insert -> Attach File. To attach a file you need to specify a display text that will be display on the note as link. Below the display text, there is a check box Create local copy.
When Create local copy was checked, it will create a copy of the file to GloboNote storage. Anything you edit on the file will not affect the original file.
When Create local copy was unchecked, it will just create a link to the original file.
After attaching the file, you can launch it by double clicking on the link. You can also right click on the link to display more option like opening the folder where the file is located.
Attach File Context Menu
- <Filename> - Shows you the filename. Hover the filename to display a tooltip that tells you the full path of this file
- Open File - This will open the file using OS default application
- Open File Location - This will open a file explorer and navigate to the path where file can be located
- Remove Link - Unlink this file attachment
Insert Checkbox
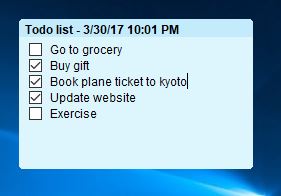
You can insert checkbox by right click on the note then go to Insert -> Checkbox. Click on the checkbox to toggle check/uncheck.
Create List
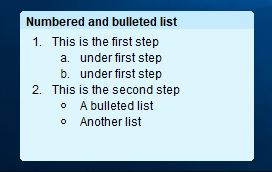
You can add bulleted and numbered lists to note.
To create bulleted list, right click on the note then go to Edit Text -> Bulleted List. Default shortcut key to create bulleted list is Ctrl-Shift-8.
To create numbered list, right click on the note then go to Edit Text -> Numbered List. Default shortcut key to create numbered list is Ctrl-Shift-7.
